Pumpkin Bread Pudding

Monday, November 19, 2012

Thanksgiving it is my favorite holiday and I love everything pumpkin. Garden and Gun just wrote an article on Southern Thanksgiving Favorites and this amazingly, unique, 
looking Pumpkin Bread Pudding caught my eye. 

I am getting ready to make my Thanksgiving Feast List and I am putting the ingredients for this on it.  

Puts you in the mood for pumpkin doesn't it? Do you have a favorite recipe? 

Going for Gold.

Tuesday, August 14, 2012

I have been taking a little blogging break.  It wasn't intentional my life just got really busy and it just kind of happened.  But when I saw this picture last night I thought what perfect  picture to come out of retirement with...

A hot Olympian with good taste.  I like the bag too!

Photo by Annie Leibovitz for Louis Vuitton

Louis Vuitton Bag


Gluten/Dairy Free Birthday Cake.

Sunday, April 22, 2012

I have a daughter who has food allergies and let me just tell you it SUCKS!  Yes, my Dad if he was reading this would be emailing, texting, calling me, telling me it is unladylike to be using such language especially if it is in text because "once its written down Laura you can never take it away..."

I know... I know...I would tell him but it does! 

Not only does it suck for her because she get horrible eczema from certain foods and because she is only 2 and wants to eat what everyone else is eating but it sucks for me too because its like a 3rd job trying to manage her food intake...

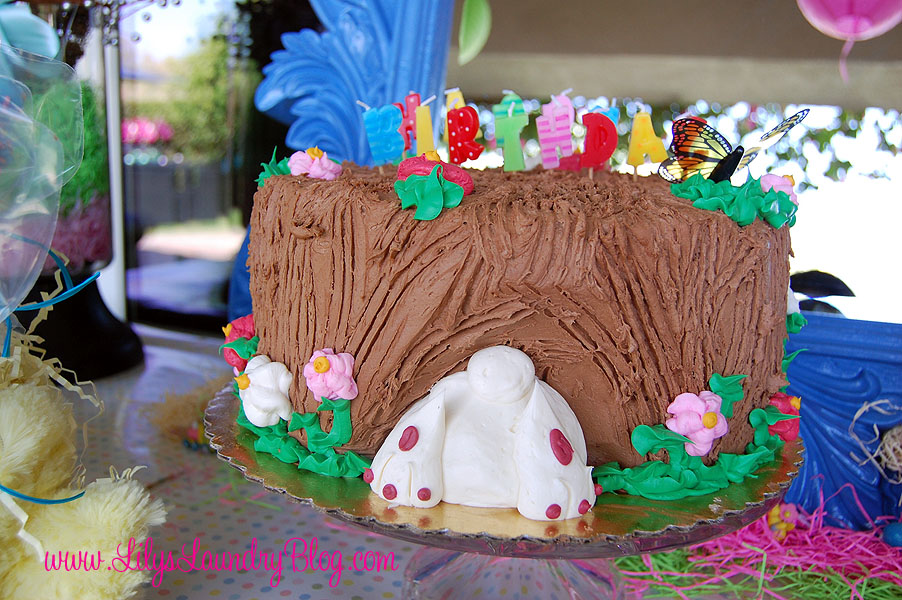
Any who my good friend Brittany, who threw the Seashell 40th Birthday with me, made the cake for the evening.  She made it gluten free and IT WAS DELICIOUS.  I emailed her to get the instructions and here's what she sent me.  I thought I would share.


Hi Miss L,

Here is the recipe for Miss Cosette’s cake:

Pamela’s Gluten/Dairy Free Chocolate Cake Mix:
I added the following ingredients and beat with electric mixer on medium:
½ cup coconut oil
3 eggs (recipe calls for 2, but you can use 3 to make lighter J)
Pre-heat oven to according to package instructions
I greased the cupcake pan with coconut oil before dividing the cake mix
I baked it for about 50 minutes (but all oven temps vary)
I baked the cake a night ahead of time, let it come to room temp and placed saran wrap around both halves (and that into a gallon freezer bag) and placed into the freezer. I took it out about 2 hours before I whipped up the frosting

Pamela’s Vanilla Frosting (Gluten-Free)
I used an electric mixer on medium until all was blended (then on low when added in water)
I used 2 bags as 1 bag really didn’t cover the job J, therefore I doubled everything
I used 2 cups of room temperature butter (Really light, I know)
2 teaspoons of almond extract (can use more depending upon your taste palate)
2 tablespoons of water (add slowly) can add more water depending upon the thickness you prefer
I placed all the frosting in one gallon zip lock. I pushed all frosting to one of the bottom corners of zip lock bag and then cut a corner off (to make a mock frosting tip).
Frost as you desire J

I used a Giant cupcake tin: they are available at Michael’s, Bed, Bath & Beyond

Me Again....
I made this recipe for Claire and took some cupcakes to school for her to be frozen so she could have a treat when the other kids did too.   I used Vegetable Shortening though instead of butter for the frosting to make it completely dairy free.  The texture and the flavor turned almost the same as using butter.

This picture sucks too...LOL Please forgive ;)

Happy Gluten/Dairy Free Baking ;)

Darling 1st Birthday Party: "Our Little Fishy is Turning 1"

Thursday, April 19, 2012


Click to play this Smilebox slideshow
Create your own slideshow - Powered by Smilebox


In my college circle of sorority girlfriends, we refer to ourselves as, The La La's, (bc all our names start with either L's or A's) they're two Lauras.  Myself, whom everyone calls me to this day "Madonna" (I still get a chuckle out of it.  I don't think they have called me Laura for like 13 years)  and another girlfriend we call "Sweet" Laura, whom is just that, SWEET.  She's sweet natured, kind spirited, and as you can see from this amazing party she threw for her little one, a sweet mama.

Sweet Laura, emailed me a couple of weeks ago with a darling idea for her daughter Evelyn's 1st Birthday.  She had found a cute invitation and had the theme "Our Little Fishy is turning 1" and asked me to create a printable to go with party.

I asked her to write a little description of the party and here's what she sent me. I couldn't decided on the pics because they were all so cute so I add them all up top in a slide show.


Planning our daughter's first birthday was so much fun!  We wanted it to truly be a celebration with our families and closest friends.  Evelyn is so sweet and loves splashing in the pool so we chose a pool party theme!   This way the older kids would have something fun to do and it was a great way to enjoy the beautiful spring weather.  We heated the pool the day before so the water temperature was perfect! The pool idea allowed me to coordinate a cute fishy theme perfect for a one year old party. I was also able to create an all seafood menu including crab cakes, oysters, shrimp, and fish spread which was a hit!  I used cookie cutters to make fish and starfish "peanut and jellyfish" sandwiches and paper cones of "fish and chips" (goldfish and Doritos) for the kids!  We served a white wine sangria along with beer and wine which went perfectly for the seafood menu and warm spring weather. 

I loved best making the party favors!  Each child received a personalized pails with fun party straws, leis, bubbles, sunglasses, and sweedish fish candy! Party tags of "thanks for making my party a splash" were tied to each pail.  My years of sorority date functions and decorating buckets finally paid off!  I also loved going through and finding pictures from the year to make a banner to hang over the drink table.  You forget how little they are and was a great way to see how much Evelyn has grown! 

The most challenging aspect of the party was getting the fabric to stick to the pool screen.  I ended up using small safety pins which were small enough to use without damaging the screen. 
I got ideas simply from goggling everything from "pool party"  to "beach cupcakes".  I think the watermelon shark was the biggest hit!  I came across a picture of a watermelon carved like a shark for a shark week party.  I looked on "you tube" and followed directions for the carving.  I was amazed how simple it was.  Thank goodness for the Internet!

As you can tell from the pictures... Evelyn loved her first cupcake!  We chose aqua icing like the sea and decorating some with goldfish and cake toppers.  Some of the cupcakes had graham cracker crumbs to make a sand appearance.  I used party umbrella with a gumball to make a beach scene! Evelyn didn't know what to do at first but once she tasted her goldfish with the icing... it was all over!  We had a small baby pool with water so after she was done, she just played in the pool and made for easy clean up! 

 Evelyn's first party was truly amazing.  I think what makes the party stand out was all the small detail and personal touches Laura created for me with the printables.  It was exactly how I imagined it and I couldn't have pulled it off without her help!!!  Thank you so much Laura for making "our little fishy" first birthday party such a success!


Sweet Baby Boy's 1st Birthday Party and Egg Hunt

Wednesday, April 11, 2012

Our Sweet Baby is turns one today and so we threw him a little birthday party this past weekend. It was really last minute and I wasn't going to do it but my husband made me feel guilty.  I am glad he did because it was lots of fun...It started at 11 am and some of our friends ended up staying till like 10 at night...Oh Goodness I think we had one too many "Bunny Tails" and we didn't want the day to end.  We had an egg hunt, the boys watched The Masters, the kids swam and our little buddy got his first piece of cake.

I love this time of year. The colors of spring make it so easy to decorate.

See below for all the details.


Here's what I did and where I bought things.

 Lanterns:  A couple of years ago I drilled screws into the stucco above my table outside so every time we have a party I hang something over the table. This time I used used colored lanterns I bought at my local party store. I strung them up with colored raffia.

 Table Covering: It's wrapping paper from the dollar store. GENIUS! A mother in Lily's class did this last week for the kids school party. It was so cute and totally gave the table a pop...so I copied her idea for our party.

Mirror: This mirror has been hanging over my bed for 7 years and last week it bored me, so I took it down and painted it. The color wasn't exactly what I was hoping for to put back in my room, but it fit my table perfectly, so I used it outside. I  hung egg garland and a "Hoppy Easter" banner over it. I used earthquake putting to kept garland and banner in place.

Apothecary Jars: I have a large collection of these. They are great for any kind of party. I filled mine with crinkle paper/Easter Straw then layered with Peeps and Marshmallows. You can use crinkle paper all year long and it gives the table lots of texture.

 Flowers: I buy all my flowers at my local Farmers Market. It is on Wednesday but the flowers are always so fresh they last for a week or so.

 Cake: I got this darling cake at Bristol Farms. Not only is it cute but it also tastes really yummy. I found a picture on Pinterest and then just email it to them. EASY!

 Gift Bags and Glasses: Personalized cups are fun and you can reuse them. I ordered from one of my favorite party supply stores Beau-Coup.com

Printables: Me! I didn't do a ton for this party but you can check out what we have done in the past on our blog or on our Etsy site. If you want something custom you can email us.

Bunny Cake Pops:  My sweet Nanny made them for the kids.  Thank you Maribel!

Other great resources: Marshalls, TJ Maxx, Home Goods, Micheal's, Joanne Fabrics, Potterybarn.

Seashell Inspired Surprise 40th Birthday

Tuesday, April 3, 2012

A sweet friend of mine, Cosette is turning 40!  I personally don't think there is a better birthday present for a friend who "is not a big fan of  surprises" then to throw them a surprise party, do you?  So another darling girlfriend of mine, Brittany, and I got together over lunch and plotted to do just that, Surprise Cosette! 

Her hubby is taking her to Hawaii for her birthday so we played our design of the table off their trip. We went with sophisticated beach, seashell, Hawaii theme.  We picked colors we thought reminded us of her.  She always seems to wear and look good in cool colors.  Teals, blues, greens...

I went on a mission shopping for inspiration (that's usually how I come up with my ideas) and Brittany went on a mission to organize restaurant (Tommy Bahamas), a  Gluten/Dairy Free Cake and a set list for our party favor of the best music of 1972.  Tommy Bahamas, the cake and the CD rocked!

Here's what we came up with...

Look at the fabulous view in the background!  I love where I live.

Labeled wine glasses to personalize table
and for seating arrangements.
Sea glass, paper flowers, drift wood, candles, burlap runner
all add texture to the table.

Party Favors: Box of seashell soap
and a CD from the best music of 1972, the year she was born.
The menu of what we were serving for the night.


Had to add some 40 Starfish printables.

She was surprised and ever so grateful and
we all had a little too much fun.

 Happy 40th Birthday Cosette!

The Today Show.

Thursday, March 22, 2012

I love the Today show.  On the mornings I don't have to drive car pool I clean my kitchen, feed my sweet baby boy and watch The Today Show.  I especially LOVE Thursday's because my salt and pepper crush, Donny Deutsch is on and he always makes me laugh.

Today John Rich co-hosted with Hoda. He was Hysterical!    I loved these baked monte cristo sandwiches Hoda, John Rich and  Gail Simmons made.  Check this segment out, Yummy!


Croissants de Boulanger: By Leigh Hall and The Joy of Cooking ;)

Wednesday, March 21, 2012


I was mindlessly checking out Facebook last week and a sweet Sorority Sister of mine from Florida (Go GATORS!) had posted this delicious pic of some croissants she had made...and my mouth started to water.  I asked her if she would send me the recipe to share with all you guys and she most graciously did.  She has a Lily too which makes me smile. 

She says the recipe is pretty intense but it was a fun challenge.  So here you go...

THANK YOU LEIGH!

From the Joy of Cooking
Croissants de Boulanger
 
Place on a work surface:
3/4 pound (3 sticks) cold unsalted butter
 
Measure:
3 tablespoons all-purpose flour
 
Sprinkle the butter with a little of the flour and begin to beat it with a rolling pin.  Scrape the butter from the work surface and the rolling pin as needed and fold it over itself into a heap.  Continue to work the butter until it is a smooth and malleable mass (without any hard lumps).  Knead the remaining flour into the butter with your hands, working quickly to keep the butter cold.  Place the butter on a sheet of plastic wrap and shape it into a 9 x 6 inch rectangle.  Wrap and refrigerate the butter while you are making the dough. 
 
Whisk together and let stand until the yeast is dissolved, about 5 minutes:
1 cup warm (105 to 115 degrees F) whole milk
2 1/2 teaspoons active dry yeast
1 tablespoon sugar
 
Mix together in a large bowl:
2 3/4 cups all-purpose flour
1 teaspoon salt
2 tablespoons unsalted butter, softened and cut into small pieces
 
Make a well and add the warm milk mixture.  Mix with a fork or your fingers to make a dough.  Transfer to a lightly floured surface and knead for a few seconds until smooth.  Let the dough stand for 5 minutes.  Sprinkle the top of the dough with flour and roll into a 15 1/2 x 8 inch rectangle, sprinkling additional flour underneath as needed to prevent sticking.  Position the upper two-thirds of the dough with the rectangle of butter, leaving a 1 inch border of dough along the sides and at the top.  Fold the bottom third of the dough with the butter on it, down over the first third, as if you were folding a business letter.  Press the edges of the dough together on all 3 sides to seal in the butter.  Rotate the dough so that the folded edge is on the left and the sealed edge on the right to change the direction of the pastry for the next roll.
 
Sprinkle the dough lightly with flour and press it gently with the rolling pin to flatten it slightly.  Roll into an 18 x 8 inch rectangle, keeping the short side of the rectangle facing you.  Fold the bottom third up and the top third down, as if folding a business letter.  This rolling and folding is called a single turn.  Rotate the dough so that the folded edge is on the left and the open edge is on the right (like a book about to be opened).  Give the dough one more single turn, rolling it an 18 x 8 inch rectangle and folding it in thirds.  (Sprinkle the work surface lightly with flour as needed to prevent the dough from sticking.  If at any time the butter gets soft, refrigerate it for 10 to 15 minutes.)  Mark the dough with 2 imprints to remind yourself that you have given the dough 2 turns.  Wrap the dough loosely in plastic and refrigerate for 30 minutes.
 
Place the dough so the folded edge is on the left and the open edge is on the right, and give it another turn.  Rotate and give the dough its final, fourth turn.  If at any time the butter gets soft, refrigerate it for 10 to 15 minutes.  When the 4 turns are completed, make 4 imprints to remind yourself that it is done, wrap the dough loosely in plastic, and refrigerate for 1 hour to overnight.  (At this point the dough can also be frozen, wrapped in plastic, then aluminum foil, then in a plastic bag with the air removed.  If frozen, thaw overnight in the refrigerator before proceeding.)
 
To Cut and Shape: Roll the dough into a 24 x 12 inch rectangle, about 1/4 inch thick.  Let stand for 5 minutes, to relax the gluten and prevent shrinkage when cut.  Cut the dough lengthwise into two 24 x 6 inch rectangular strips.  Refrigerate 1 rectangle.  Position the remaining rectangle with one long side in front of you, parallel to the edge of the counter.  Starting from the left, mark the bottom edge of the dough by nicking it with a knife at 4 1/2 inch intervals.  Mark the top edge of the dough once 2 1/4 inches from the left edge, then continue to mark it at 4 1/2 inch intervals.  To cut the dough into triangles, cut from the bottom left corner of the dough to the first mark at the top, then from the first mark at the top to the first mark at the bottom, and so forth until all 9 triangles are cut.  In the middle of the shortest side of each triangle, make a nick, 1/4 inch long.
 
To form a croissant, stretch the short side of a triangle by pulling the corners gently as you begin to roll the stretched edge tightly (but not too tightly) toward the opposite point of the triangle.  Finish rolling the croissant so that the point of the triangle is on the bottom of the roll.  Shape the other croissants in the same manner.  Repeat the cutter and shaping procedure with the second rectangle.
 
 
To bake the croissants:  Position a rack in the lower third of the oven.  Preheat the oven to 375.  Brush each croissant lightly with some of:
1 egg, lightly beaten
Bake on the unbuttered baking sheets until golden brown, 20 to 25 minutes.  Transfer the croissants to the rack and let cool completely. Croissants are best served on the day they are baked.

Happy Baking!

Garden and Gun's Southern Food Bracket

Tuesday, March 20, 2012


I have ever posted that Garden and Gun is my favorite magazine?  It has the best stuff in it.  I get their weekly email/blog posts right into my inbox and always make sure to take the time to read.

 Right now they have their version of the March Madness Bracket but with Southern food.

Yummy and Fun!

I filled mine out.  But it was so hard...Who can choose between Mac and Cheese and Collard Greens? It's nearly impossible to pick between Beignets and Shrimp Boys boys?

I had six winners...Is that allowed?

Pulled Pork, Boiled Peanuts, Fried Chicken, Country Fried Steak, Beignets and of course Collard Greens ;)

Portuguese Chicken: bonappetit.com

Tuesday, February 28, 2012

My Mom has been telling me about this recipe for Portuguese Chicken for a couple of months. Last Friday night we were invited to some friends house for dinner and I thought I'd let them be my testers.  It was a hit. My husband fell in love.  He ate it for 3 nights in a row.

It's a little on the complicated side only because the recipe included things I don't normally stock in my pantry.

 I don't usually have jarred roasted peppers...Is that odd?

I followed the recipe to a t...which is usually not in my nature.  My second picture the colors aren't so great because I lost my sun...oh well..Happy Cooking!


Find it here: Portuguese Chicken: bonappetit.com

LinkWithin

Related Posts with Thumbnails